Showing posts with label China Glaze. Show all posts

Thursday, September 6, 2012

China Glaze Reggae To Riches & Cirque Fascination Street


Howdy!

I had this manicure two weeks ago and only managed to post it up now. I have another one pending.. oh my, even blogs have backlogs!

What you see here is China Glaze Reggae To Riches; I knew of this polish last year and was secretly lemming for it. Well, I did it discreetly because I had a long list of to-buys and was distracted by the new collections popping out in seasons. I just didn't have time to look back. Now, when this RTR caught my attention in Star Trinkets, I bought it without hesitation.

I mentioned before, Color Makeup 5 could be a dupe but no, it's not. CM 5 is a fuchsia-near-neon-more-pink-tone with blue flash. CG Reggae To Riches is violet pink with bluish-purple shimmer.


Shown on my nails, 2 coats with topcoat.


Yup, bubbles on them. Bummer! (pun intended!) My instinct told me to blame the polish. Then I sat down dejectedly, because I knew some of the bumps were the result of my rough nail beds. I was one of those kids who bite nails, and continued doing so into my adulthood. I only managed to quit the ugly habit two years ago. By then, no surprises there, my nails are dented with teeth marks. Looks like I gonna rely heavily on ridge-filler from now on! :(

[side-note] When I put RTR on, it reminded me of Nicki Minaj. She's always in violet, pink or fuchsia.. I can't shake off her image from RTR. The hair color and body suit may not be perfect match to RTR, but still... 


I lived with the bumpy manicure for a week. On that Saturday, I made an impulse move by putting Cirque Fascination Street on the tips. It was supposed to be a "gradient" effect. Yea, supposed to. Didn't look like it that way:


A medium shade is missing to create the gradient flow. I didn't have time; I was already running late for appointment. My impulse action sequence began by putting weight from the brush on the tips and light strokes from top to mid-section - all these were done in less than 3 minutes for 10 nails. That's faster than waiting for instant noodles to be ready at the table. Yep, that's instant for you and end results, for a noob like me, produced such bad color-coordinated manicure. HEE, sorry if they are eyesores :)

I owe Cirque Fascination Street a proper introduction. I will do a better NOTW for FS, I promise. In the meantime, check out FS' holographic effect, taken indoors:


Till next time, let's hope for a better manicure!

Tuesday, August 21, 2012

China Glaze Aquadelic


Hello there!

I bought China Glaze Aquadelic from Star Trinkets two weeks back, along with two other CG polish: Passion, Reggae to Riches. They are under TSS Blog Sale, click on the links if you wanna catch the rest of the goodies (but pls leave some for me!).

If you don't already know, Star Trinkets is owned by a nice lady called Susan, whom has a personal nail blog called The Subtle Shimmer. She blogs almost daily, with good details on the polish and great swatches. Do visit her sites!


I have used China Glaze Passion for konad stamping in my previous post. So today I'm showing China Glaze Aquadelic! It's turquoise with more green than blue; bright but definitely not neon. It's a summery color, makes one cheery and happy!


As with most of CG polish (or from those in my stash), application is smooth, well-pigmented and not too runny. But it became thick after 30 minutes, which made it harder to manage. Brush also tends to pick up more polish and result in globs deposited on the nails.


It would have been a good manicure, except it bubbled. Or so I think? I am beginning to wonder if those bumps are the result of the imperfections on my nails. I could have used my ridge filler but I painted my nails on a weekday night and didn't have time to redo everything. The next morning I rushed to take photos and zoomed off to work.


Anyhoo, photos show two coats but you can easily get away with one. I freaked out on the bumps and tried to cover them up - of course it didn't work.

And since it wasn't done well, I shall be kind to your eyes by not spamming this post with more photos :)
Thanks for reading!


Thursday, August 9, 2012

Australis Mates Rates


Wow it has been that long since my last post.. almost 5 months!
Time to dust off the cobwebs and revive Nailbytes!


What I have here today is Australis Mates Rates which I believe is only available in Australia. My friend was there for a month and I have asked for nail polish, specifically only made in Australia. Boy, he came back with a bundle! Not only did he manage to get those Australis polish which I painstakingly picked from online reviews, he also managed to get Face of Australia and Bloom! I will post the swatches soon, all in good time :-)


Australis Mates Rates is a deep forest green polish with gold shimmer. The gold overlay gives a dark olive shade. I might have mentioned before that I usually avoid green on my nails because it doesn't suit my skin tone, creating a washed out look. However I suppose it only applies to greens in pastel, jade and dusty shades.. with Mates Rates my nails look fab!


Application is smooth, drying time is fast too. But the brush is left to be desired; a bit hard, kinda rebellious by refusing to obey the directions. Not sure if this is an isolated case, will test out other Australis polish next time!

This green baby is opaque in two coats; you can have it in one and with one you can see a teal underlay:


Under direct sunlight, the gold shimmer is very evident on the nails:


In natural daylight it reflects the blackened green with gold peeking out in certain angles:


There are bubbles on the nails, hmm. I suppose in such weather with constant movements while they're still wet (i was walking to and fro in the house lol) give rise to these bumps. It's pretty on its own but to hide the hideous imperfections I resorted to stamping :-P


I used China Glaze Passion (metallic chrome gold) for the leopard prints. Turned out to be better than expected!


*excuse the dry cuticles! it's been awhile they took the center stage in macro shots!

All above are shown with 2 layers of base coat (to prevent staining). No topcoat.

Wednesday, March 7, 2012

China Glaze For Audrey & ELF Chocolate = Let's Play!

Hello readers!

It's a Wednesday, mid-week of early March and I have almost lost count of the date and days because I have been bumming at home :) Left the company and currently having a helluva time packing and cleaning. Nonetheless, I did not forget manicures!

This is done last week, a simple design and require little effort. All you need is masking tape to create the shape. My friend said they looked like Play buttons and hence the post title, ha!

First up, as usual, bottle pics!


For this manicure I used China Glaze For Audrey and ELF Chocolate. My CG is almost finishing and application is thick and gluey, making it a chore to apply and to even out. ELF Chocolate is a delicious brown true to its name, like chocolate fudge. It dries glossy, super shiny.. surprising for a polish belonging to a non-dedicated polish brand!


For Audrey is a Tiffany blue but of course it's not the exact color, it should be 98% similar and this dreamy cottage blue suits ALL skin tones. I was a fool to use it for nail art, it's so pretty on its own. To compensate I used it for pedicure :)


I apply CG For Audrey as base and let it dry completely. Using masking tape, I cut various triangle shapes and placed them onto nails. After which paint one or two coats of ELF Chocolate and remove the triangles. Let dry and add top coat. Ta-daah!


Besides looking like Play buttons, do they remind you of anything? Do you like this design? :)

Friday, December 2, 2011

China Glaze Urban Night + Color Club Fashion Addict and Konad

Hello there! We're now entering the last month of year 2011. How has this week been treating you?

I was in Bali for the long weekend, though I enjoyed myself but I didn't like the night scenes in Kuta and Legian. Weather was hot, humid but the sunset view was spectacular!

Before my trip I put on this manicure and by the time I came back, most of them were chipped off. So right now I'm "cleansing" my nails by leaving it bare with a layer of top coat.

For this post I'm putting up tons of photos... It was a day with unpredictable weather. Sunny at first, raining after that and moody storm followed through. I was also rushing to complete my mani to attend my cousin's wedding... with these factors, please forgive the unclean and imperfect look!


Here's the bottle picture of China Glaze Urban Night and Color Club Fashion Addict:


Remember I have Color Club Revvvolution that doesn't have any holographic effect? I decided to test other Color Club's holographic polish by buying Fashion Addict and Worth The Risque. Unfortunately the holo that was raved by bloggers did not show up on my nails either.

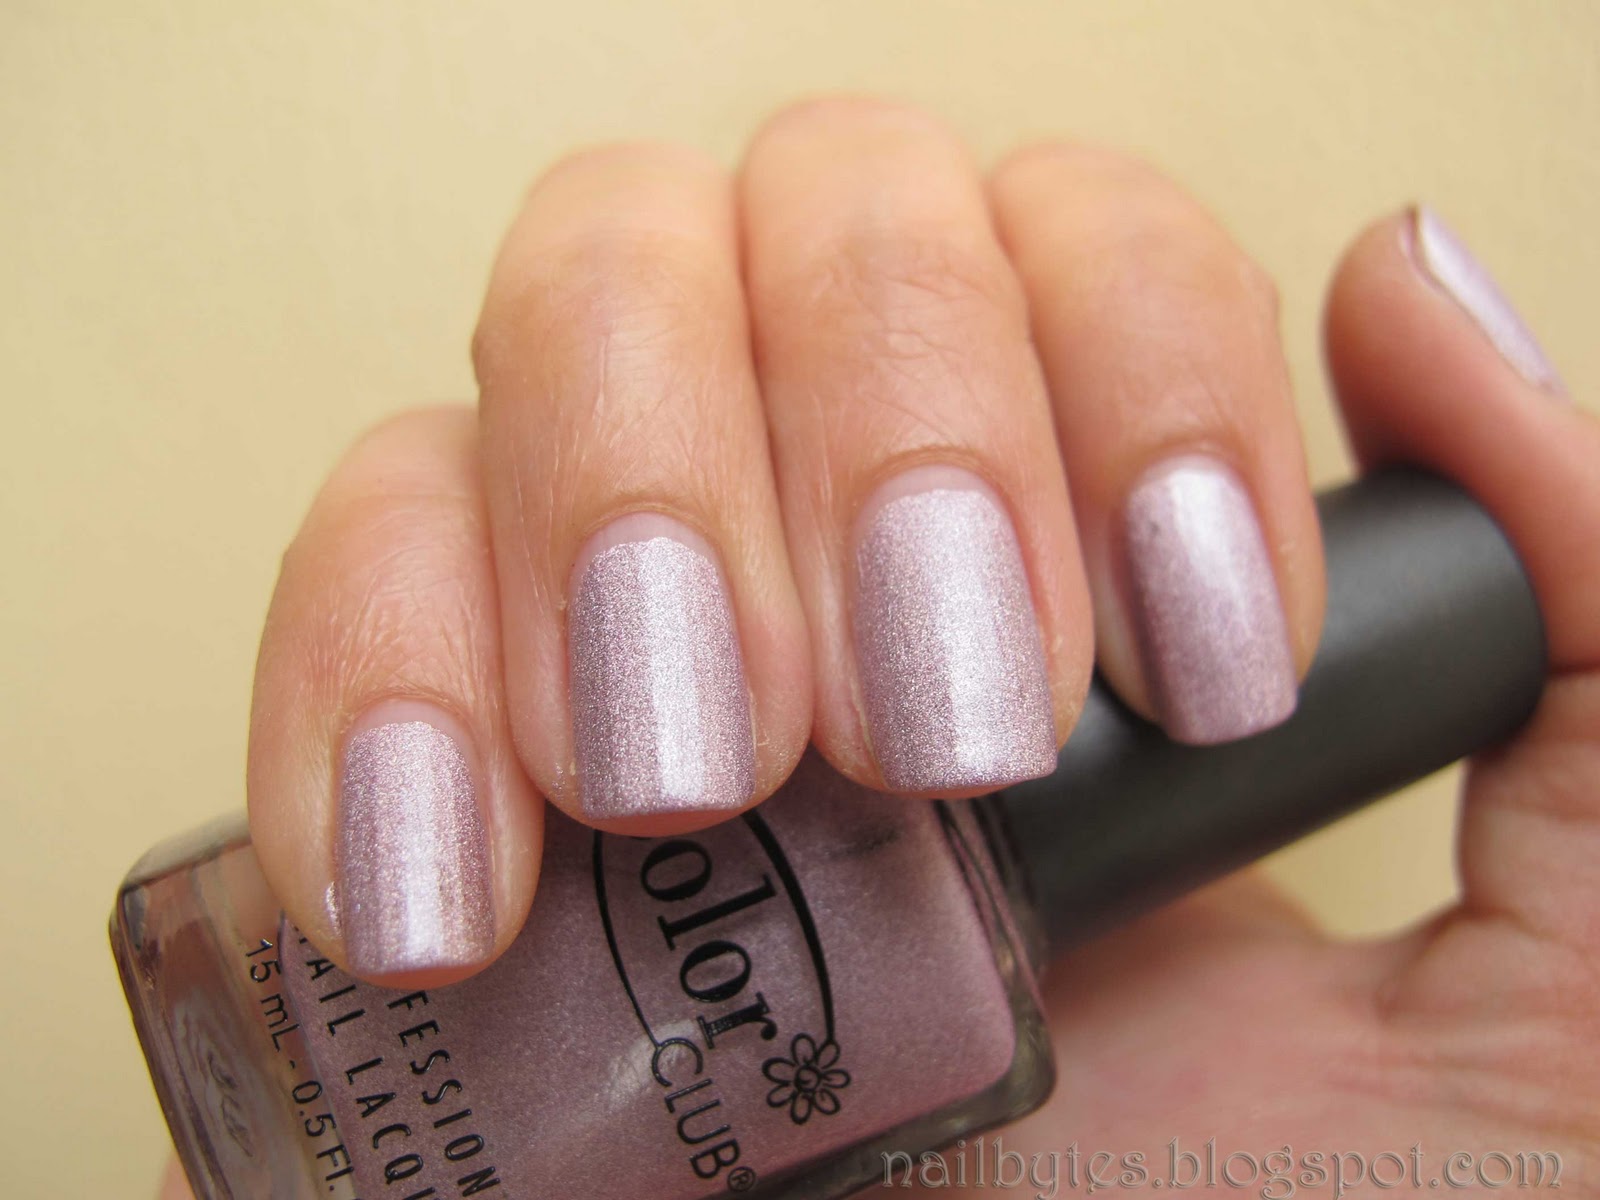
Color Club Fashion Addict is a sweet lavender polish that's packed with shimmers. Below photo was taken indoors, painted with two thin coats.

Holo? Meh.


Fashion Addict in outdoor, under the shade.
Holo? Zits.


Finally Fashion Addict under natural light, outdoor.
Holo holo? Nope. I don't see it.


Despite the non-existent holo, I like the shimmery pastel shade even though a stronger tone of lavender with brighter shimmers would be more suitable to be called Fashion Addict. Nonetheless, a pretty color for my mellow days :)

Next up is the base for my mani. China Glaze Urban Night from Metro collection!


China Glaze Urban Night is a rich true purple that looks yummy and inviting. Others call it an eggplant color. I must say I quite like it, a color that's not over- or under-stated yet stood out like a royal being. It's the perfect shade for Fall and I love how China Glaze aptly named it as Urban Night... it looks metro chic and sophisticated, doesn't it? :)

As with other CG polish, it takes two coats to reach opacity and builds up beautifully. High gloss and fast drying too!


Ok on to the real stuff! Below are my Konad mani with leopard prints, using image plate M57.


I used CG Urban Night as base and CC Fashion Addict for stamping.
Taken without top coat:


Hang on... did you see the holo in Fashion Addict? It's shy, it's subtle but YES IT'S THERE!


I suppose the holo effect is only visible in small areas, most probably due to it being a scattered holo. Oh well, at least I didn't get a dupe!

However the holo effect vanished when I added a layer of top coat:


I was a bit skeptical on the design but it caught a lot of attention! I get questions from colleagues, acquaintances and friends on the stamping process and they were quite, in fact, in awe! That really made my week a great one!

Friday, November 18, 2011

China Glaze Westside Warrior + Trendsetter and Konad!

TGIF!

I haven't been posting much, I know. My card reader isn't working right which caused significant delay in transferring photos from camera to hard disk.

Today I'm showing a konad mani! YES I HAVE KONAD SET. FINALLY!

I bought Konad Special Set at a discounted price, thanks to Groupon. I actually received it in late October and my first attempt was pathetic. I did it with Nubar Baby Blue for my bestie's wedding ceremony and if you recall, I was ashamed to post it here since there were awful bubbles and bad stamping work on my nails. I had serious issues with Konad polish, they are very gooey and dried too fast. I couldn't transfer the image to my nails properly and everything went downhill from there. I almost gave up but I remembered other bloggers had recommended China Glaze polish for stamping. Hey, they're so damn right. It glided on smoothly, easily and with the added benefit of various colors to play with!

Here's the picture of my Konad Special Set!


This set includes:

  • Instruction CD
  • Step-by-step guide in paper
  • Product catalog
  • 5 Konad special polish (red, white, green, pink pearl, black pearl)
  • 1 Top coat
  • 5 Image plates (M3,M36,M44,M55,M57)
  • 30 Rhinestones
  • 1 Image plate holder
  • 1 Stamp and 1 Scraper


For my manicure-of-the-week (MOTW), I used China Glaze Westside Warrior and Trendsetter from Metro collection Fall 2011.


China Glaze Trendsetter is a mustard-olive polish with subtle shimmers. It looks sandy indoors but dazzles under the sun. Pigmentation is superb, a medium coat will reach opacity! This may not be a congeniality shade, much like OPI Who The Shrek Are You. I, however, like how unusual it looks on the nails. As I said, hidden gems are the most treasured.


China Glaze Westside Warrior is in military green shade. The color from the bottle appears a level lighter than how it looks on the nails. I took the photos after a heavy rain and lighting failed to reflect the actual color. What you see is a tad darker than in reality. Think of it as the color in army fatigues.

It's a little tacky on the application because it drags and result in patches. But it builds up beautifully; I applied two coats for complete coverage.


Are you ready to see my 2nd feeble attempt in stamping? It wasn't perfect but at least they transferred to my nails.

I chose the zebra stripes in M57 plate.


Taken without top coat and before clean-up:


After a layer of Elianto top coat and Seche Vite top coat:


After the storm, sun came back with vengeance. It was too sunny so I took a shot of my left hand indoors. I'm a leftie so my painting skill is left to be desired:


If you notice, the lines on my right are different from my left's. For my right hand, I placed my fingers on the table and stamped the image but for my left's I lifted them to my eye level. I would say image looks better by using the second method!

And I gotta say I'm very pleased on the color combination. It's not in stark contrast but both complemented each other well. With Trendsetter's shimmers, it bounces on and off against the light!

I only tried China Glaze For Audrey once for marbling so I didn't know how good their polish are. After this round I'm impressed. The brush is easy to work with, pigmentation is great and they are sooooooooooo glossy and shiny. China Glaze is renowned for very good reasons. Thank you CG.

If you would like to purchase Konad products, click on the links:

Konad Malaysia
Konad Singapore
Konad Facebook (malaysia)

With this mani I renewed my interest and confidence in stamping. I intend to do it few more times, even with Konad polish and plan to get more image plates in the future. Meanwhile I'm striking out Konad in my Wish List :)

Have a good weekend!